
How to Build a Specialist Seating Assessment Checklist
Build a seating assessment checklist across four domains and record every measurement tool. Get a written report within 24 hours.
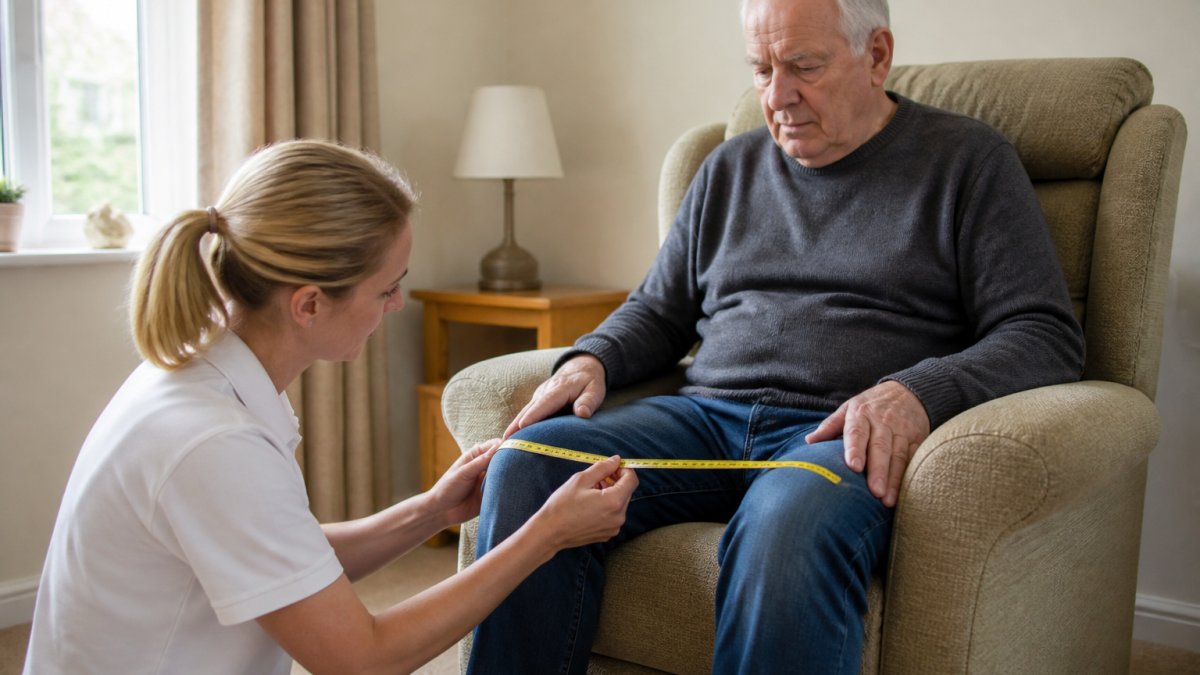

Last Updated: 2 November 2026
Quick Summary
A specialist seating assessment checklist must record four domains: posture and biomechanical alignment, pressure and tissue viability, function and occupational performance, and environment and transfers. Each domain needs its own measurements and recorded clinical reasoning, so the prescription rests on evidence rather than assumption.
- Record the tool used for each measurement, as funders may ask how a figure was obtained.
- Measure seat height from the floor to the popliteal crease with footwear on.
- Document door widths, turning space and transfer method, because a chair that fits the client but not the doorway is not a fit.
- Structure reports in a fixed order: client and context, findings, clinical reasoning, specification, outcomes and review, risks and mitigations.
- Within 24 hours of an assessment visit, we provide a written report and a separate itemised quotation.
Table of Contents
- What a Specialist Seating Assessment Checklist Must Cover
- Postural Management Assessment Tools and Measurements
- Applying Specialist Seating Prescription Criteria
- Occupational Therapy Seating Documentation That Stands Up
- Common Mistakes in Seating Assessments
- Booking a Joint Assessment with Venneo
- Frequently Asked Questions
What a Specialist Seating Assessment Checklist Must Cover
A specialist seating assessment checklist is a structured record that captures posture, pressure risk, function and environment before any chair is specified. According to the Royal College of Occupational Therapists' professional standards, assessment should be client-centred, outcome-focused and documented throughout. That standard is the benchmark, and most checklists fall short of it. (Source: Royal College of Occupational Therapists' professional standards)
The Four Domains of a Complete Assessment
A defensible checklist covers four domains: posture and biomechanical alignment, pressure and tissue viability, function and occupational performance, and environment and transfers. Each domain needs its own measurements and its own recorded reasoning. Skip one and the prescription rests on assumption rather than evidence.
A common mistake is treating the checklist as a form to complete rather than a record of clinical reasoning. The form takes ten minutes. The reasoning is what protects your client and your registration.
A complete checklist records four domains, each with its own measurements and reasoning.
| Domain | What it covers |
|---|---|
| Posture and biomechanical alignment | Alignment and postural measurements |
| Pressure and tissue viability | Pressure risk and skin status |
| Function and occupational performance | What the client needs to do |
| Environment and transfers | Door widths, turning space, transfer method |
Postural Management Assessment Tools and Measurements
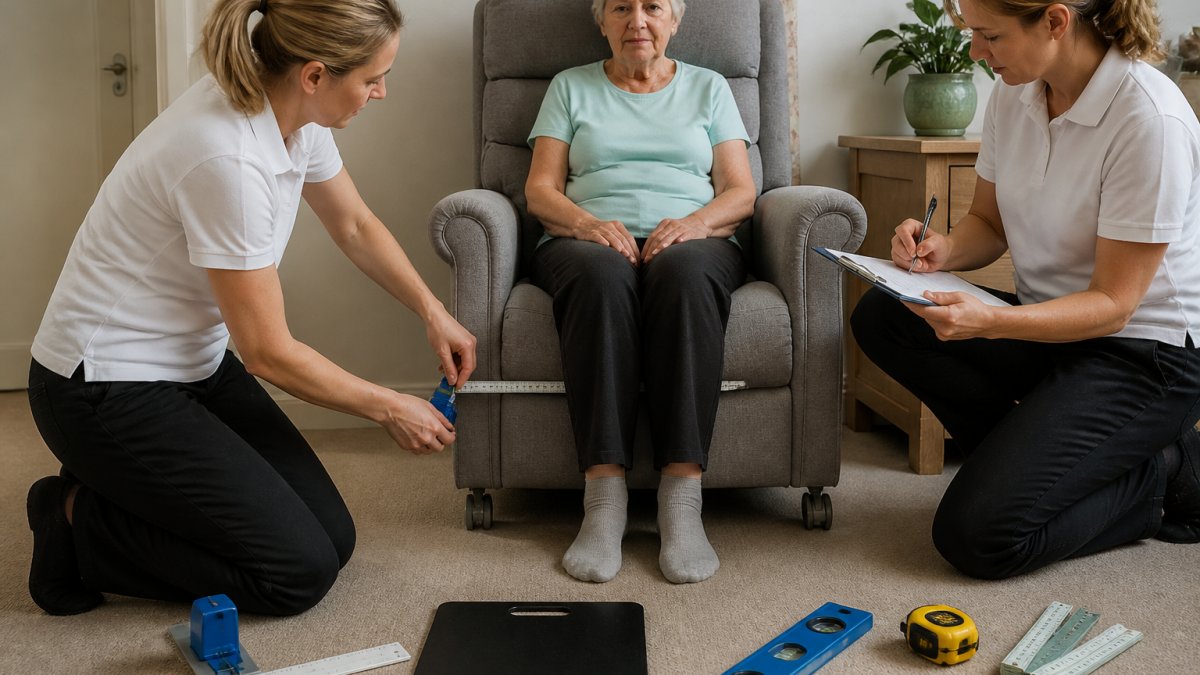
Effective postural management assessment tools combine observation, hands-on measurement and a consistent recording format. The most useful tool is a tape measure used properly, alongside a goniometer for joint angles, a plumb line for alignment, and a pressure mapping system where available.
Anthropometric Measurements That Drive the Prescription
Anthropometric measurements determine whether a chair fits the person or merely accommodates them. Record these as standard:
- Seat depth: from the posterior buttock to the popliteal fossa, less a small clearance so the back of the knee is not compressed
- Seat height: measured from the floor to the popliteal crease with footwear on
- Backrest height: to the inferior angle of the scapula, or higher where thoracic support is needed
Where a fixed measurement cannot be taken, record why. A gap in the record is a gap in the defence of your prescription. Repeat measurements with the client in the posture they will actually adopt, not a corrected posture they cannot sustain.
Pressure Mapping and Tissue Viability
Pressure mapping turns a subjective judgement about cushion suitability into a recordable finding.
Document the risk assessment tool used, the client's tissue viability status, and the rationale for the cushion interface selected.
Watch out: specifying a cushion because it worked for the last client is the fastest route to a pressure injury. Record the reasoning for this client, every time.
Static Versus Dynamic Postural Support
Static seating suits clients who hold a stable posture and need consistent pressure redistribution. Dynamic postural support, through tilt-in-space or recline, suits clients who cannot tolerate one position or who need movement for pressure relief and function. The checklist should record which the client needs and why, because the two prescribe very differently. For a client who needs regular pressure relief, record how often tilt will be used, who will operate it and whether the carer has the strength to do so.
Recording the Environment and Transfers
Measurements taken in a clinic tell you about the person, not the place. Record door widths, turning space, floor surface, the height of the bed or toilet relative to the proposed chair, and how the client transfers in and out. Note the transfer method, the equipment used and the number of assistants required, because these determine the base and castor specification as much as the seat dimensions do. (Source: guidance on pressure care management)
Applying Specialist Seating Prescription Criteria
Specialist seating prescription criteria translate assessment findings into a specification: seat dimensions, cushion interface, backrest profile, lateral supports, headrest positioning and any tilt or recline function. You can browse our postural and pressure-relieving chairs to match the criteria you have applied. The criteria are not a product list. They are the clinical requirements the product must meet.
Pressure Redistribution and Risk Assessment
Pressure redistribution is a criterion that is easily under-recorded. Document the risk assessment tool used, the client's tissue viability status, and the rationale for the cushion interface selected.
Watch out: specifying a cushion because it worked for the last client is the fastest route to a pressure injury. Record the reasoning for this client, every time.
Occupational Therapy Seating Documentation That Stands Up
Occupational therapy seating documentation must show what you assessed, what you found, what you recommended and why. A report that lists equipment without the reasoning behind it will not survive scrutiny from a funder, a case manager or a coroner.
A Template Structure That Prompts the Reasoning
A defensible report follows the assessment, not the product catalogue. Use a fixed order so that nothing is skipped:
- Client and context: diagnosis, functional history, current equipment, who was present and the client's own goals in their words
- Assessment findings: posture, measurements, pressure risk and tissue viability, function and environment, each with the method used
- Clinical reasoning: why the findings point to the specification you are proposing, and what alternatives you considered and rejected
- Specification: seat dimensions, cushion interface, backrest, supports, tilt or recline, base and castors
- Outcomes and review: the goals the equipment is meant to achieve, how success will be measured and when the prescription will be reviewed
- Risks and mitigations: what could go wrong, and what has been put in place to reduce it
A template of this kind does two things. It prompts you to record the domains you might otherwise skip, and it makes your reports comparable across a caseload, which matters when a case manager is reviewing several clients or when a colleague takes over.
The Audit Trail Funders Expect
Funders and case managers increasingly ask for the reasoning behind a specification, not just the specification. Keep the raw measurements, the pressure mapping output where taken, photographs of the client in the proposed posture with consent, and any trial notes.
Watch out: a report that lists equipment without the reasoning behind it will not survive scrutiny from a funder, a case manager or a coroner. The reasoning is the document; the equipment list is its conclusion.
Review and Handover
Documentation does not end at delivery. Record the handover: who was trained, what they were trained on, and what to do if the client's posture or pressure risk changes. Set a review date and record the triggers that would bring it forward, such as a change in weight, a new pressure area or a change in the care package.
Within 24 hours of an assessment visit, we provide a written report covering the client, their needs, their desired outcomes and the full specification, plus a separate itemised quotation.
Common Mistakes in Seating Assessments
The most frequent errors are predictable. For the fundamentals behind them, read our article on the challenges around bariatric seating assessments. Measuring without footwear. Recording seat depth without noting the client's posture at the time. Specifying a chair before identifying the client's goals. Omitting the environment, then discovering the chair will not pass through the doorway.
Booking a Joint Assessment with Venneo
We attend joint assessments in the client's home or care setting, on site within 48 hours. We bring options for trial, then handle delivery, setup and staff training.
If you are ready to arrange a visit, get in touch and we will respond. For discharge teams and case managers who need a date in the diary, you can enquire now and we will arrange an on-site equipment assessment.
Frequently Asked Questions
What are the essential components of a specialist seating assessment?
A complete seating assessment covers four areas: the client's clinical presentation and goals, anthropometric measurements such as seat depth, backrest height and popliteal fossa clearance, posture and pressure care needs including ischial tuberosity loading, and the environment where the chair will be used. It also records transfer safety, mobility needs and who else is involved in the multi-disciplinary team. Build your checklist around these domains, then add a section for clinical outcome measures so you can review whether the seating prescription is meeting the client's functional independence goals.
How do you document postural support needs in an OT seating assessment?
Record the direction and degree of any postural deformity, which supports are needed to manage it, and why. Note lateral supports, thoracic support, headrest positioning and pelvic stability requirements separately, with the clinical reasoning behind each. Include photographs with consent, the measurements taken, and the client's own goals. Standardised documentation templates help here: they keep the language consistent across caseloads and make it easier for case managers and funding panels to follow your reasoning. Date and sign each entry, and record any equipment trialled on the day.
What clinical measurements are required for bespoke specialist seating?
At minimum you need seat depth, seat width, backrest height, lower leg length, popliteal fossa height and hip width. Take these with the client in their usual posture, and note whether the measurement changes with support in place. Record thoracic and lumbar contours if the backrest is being contoured. For pressure care, note the cushion interface and any areas of high loading over the ischial tuberosity or sacrum. Repeat measurements at review, because postural deformity can change over time and a prescription that fitted six months ago may no longer be appropriate.
What is the role of the occupational therapist in multi-disciplinary seating reviews?
The OT usually leads on functional and postural assessment, translating the client's occupational performance goals into seating requirements. Physiotherapists contribute on tone, mobility and transfer safety; nursing staff report on skin integrity and pressure ulcer prevention; case managers coordinate funding and equipment provision. Bring a written checklist to each review so every discipline reports against the same domains. That structure keeps meetings short and gives you a clear record of decisions, which matters when you need to justify a seating intervention to a funder or discharge team.
The checklist is only as good as the assessment behind it, and a complex client deserves a second pair of clinical eyes on site. Venneo attends joint assessments within 48 hours, brings equipment options for trial, and returns a full assessment report and itemised quotation within 24 hours of the visit. Get started with Venneo and give every seating prescription a documented, defensible foundation.
Enquire now Add venneo.co.uk as a preferred source on Google →
Got a client you’re weighing options for? Send us the measurements and we’ll come back with what fits.